How to Install a Hidden 40 Inch LED Light Bar in the Hood of a Toyota Tundra
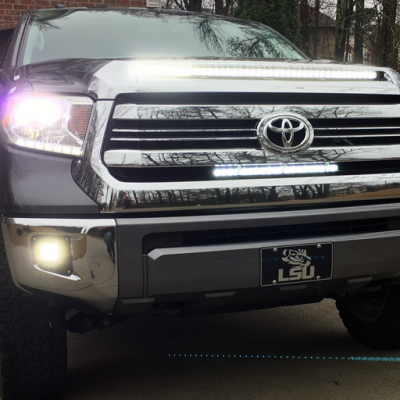
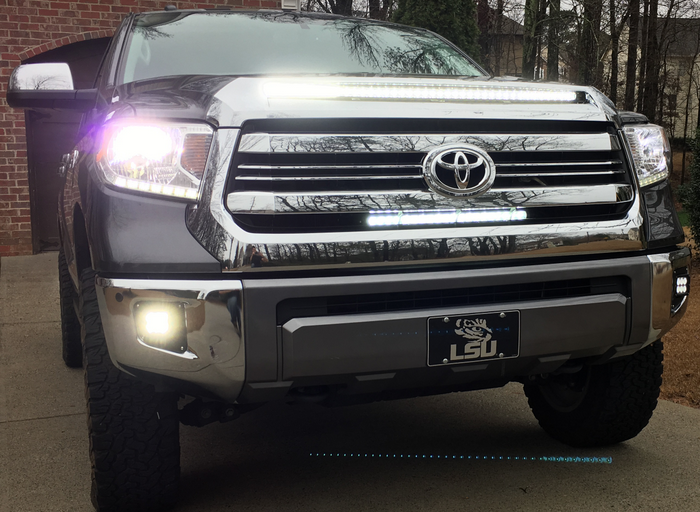
Have you ever wondered how to add an auxiliary off-road 40″ single row LED light bar in the hood vent and/or behind the grill of your Toyota Tundra?
If so, please check below to find out how one of our customers was able to successfully install a REAL LED light bar (not a cheap strip) in the hood bulge of their Toyota Tundra, while doing so with minor retro-fitting and modifications.
Recently, we received a stellar review from one of our customers that purchased a 40 inch LED light bar from Nox Lux. This particular customer went ahead and installed the 40 inch LED light bar in the hood of his Toyota Tundra, while taking pictures and detailed notes during the entire installation process. The customer then shared his entire Toyota Tundra hidden hood light bar installation process guide on the extremely popular Toyota Tundra forum, TundraTalk.net.
From there, our customer John sent us over an email with an awesome review about our performance grade off-road LED light bar, our impeccable customer service, and our extremely fast shipping. To our surprise, the email also included a link to a post on Tundra Talk where John had taken the liberty of consolidating all of his installation notes and images into an easy to read and understand “how to” article on the entire process. Check out the review here-> 40 inch LED light bar review.
Toyota Tundra Hood LED Light Bar Installation Guide
So here is the entire “How to Install a Hidden 40 Inch LED light Bar in the Hood Bulge of a Toyota Tundra” guide directly copied over from TundraTalk.net (We have permission to use the owners post and images).
For those of you who would like to add a ‘hidden’ 40-inch single row LED to your Tundra, I was able to make it work. It took about 5 hours from start to finish but if I had to do it again, I could probably finish in half the time. Here is what I did:
First, as you move along, be sure to continually check your measurements. I must have inserted and removed the light bar 20 times. You know the saying – measure twice, cut once.
Here we go:
1- I removed the top part of the grill which consisted of 3 bolts and 6 plastic clips. After removing the 3 bolts, I grabbed the right side of the grill and popped it off.
2- Next I used my dremel and cut the 3 front supports and bent them down. I would use these bent supports later for a PVC board. I also cut part of the bottom holes where the plastic clips mount to the hood. I had to do this b/c I needed the clearance for the bar.
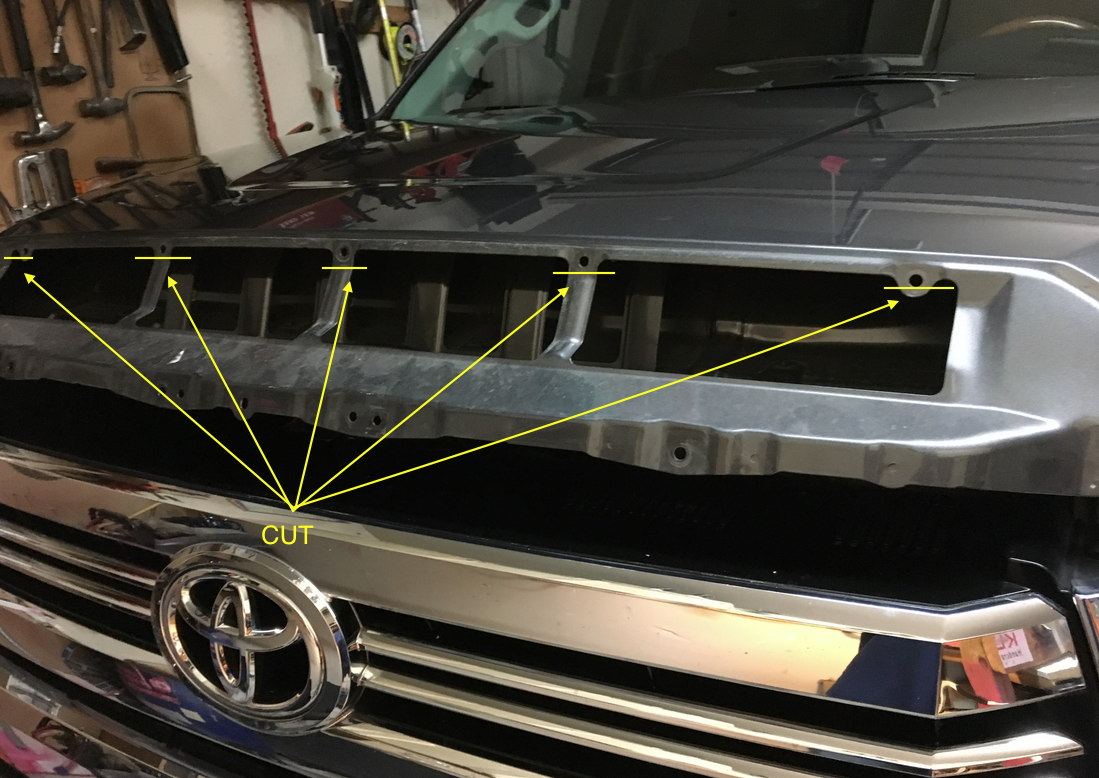
3- I grabbed the mounts supplied with the light and mounted them to the light bar. I had to cut out part of the hood so the bar would fit. I already cut the crap out of the supports so I was already locked in at this point. :/
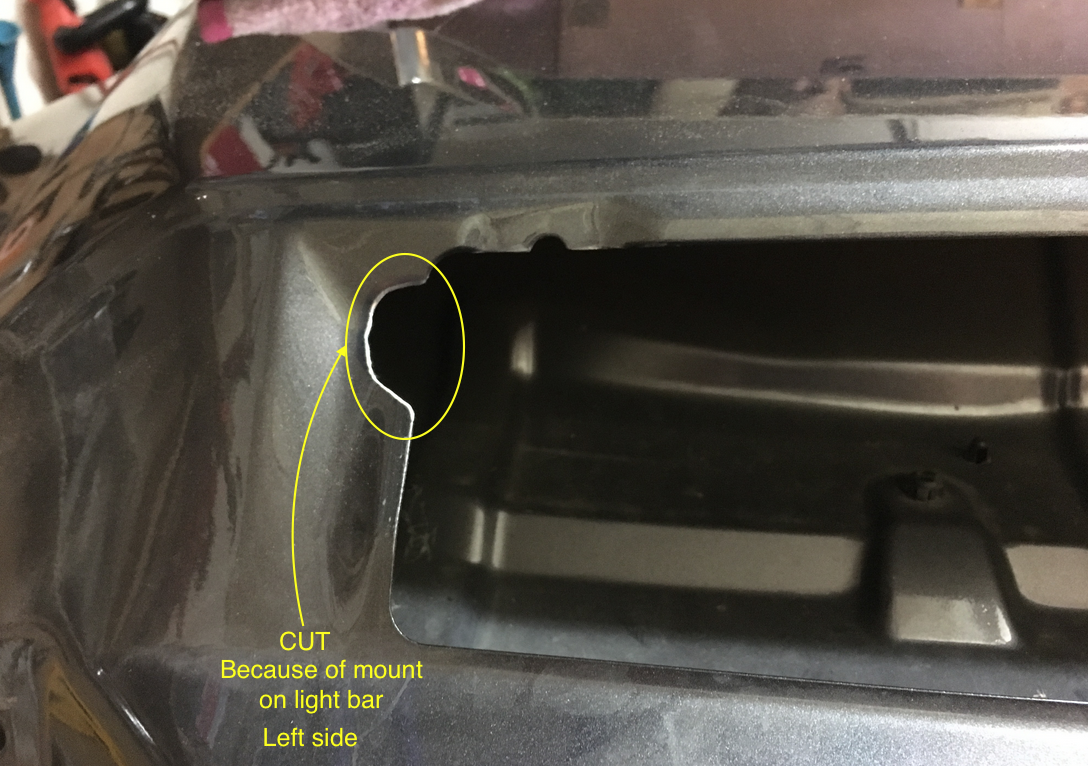
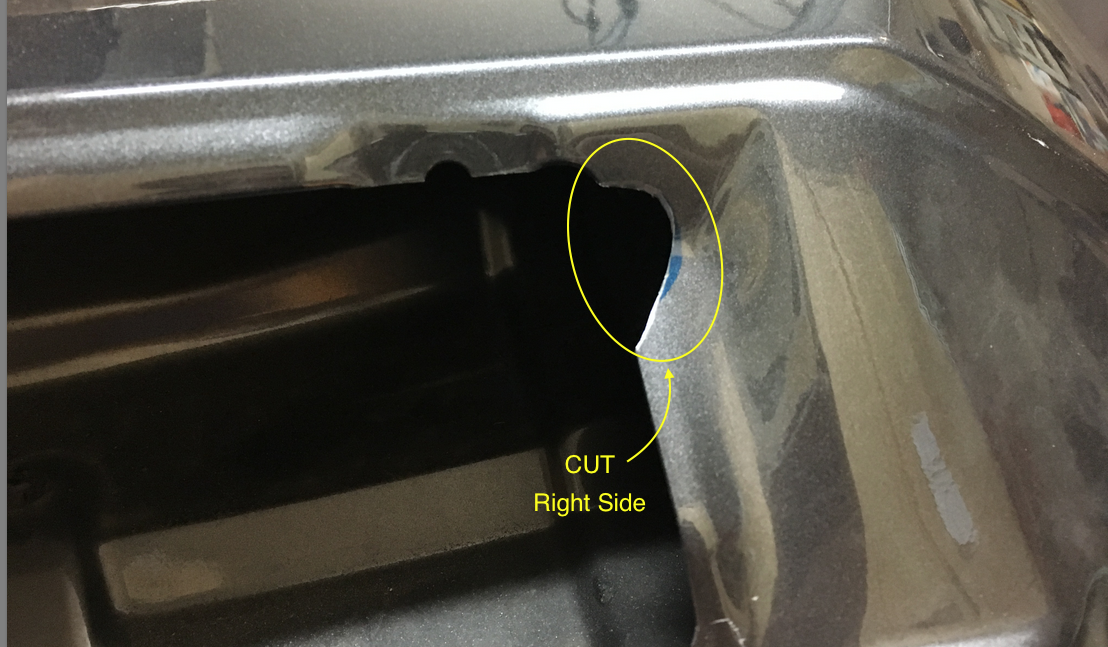
4- Next the fun part. Since the depth of the light bar is deeper than the rear supports on the hood, instead of cutting them, I thought I would try to knock them back with a mallet. Worked like a charm and since they aren’t directly connected to the top of the hood, it didn’t effect the hood at all. I knocked all 6 rear supports back and then bent down the front 3.
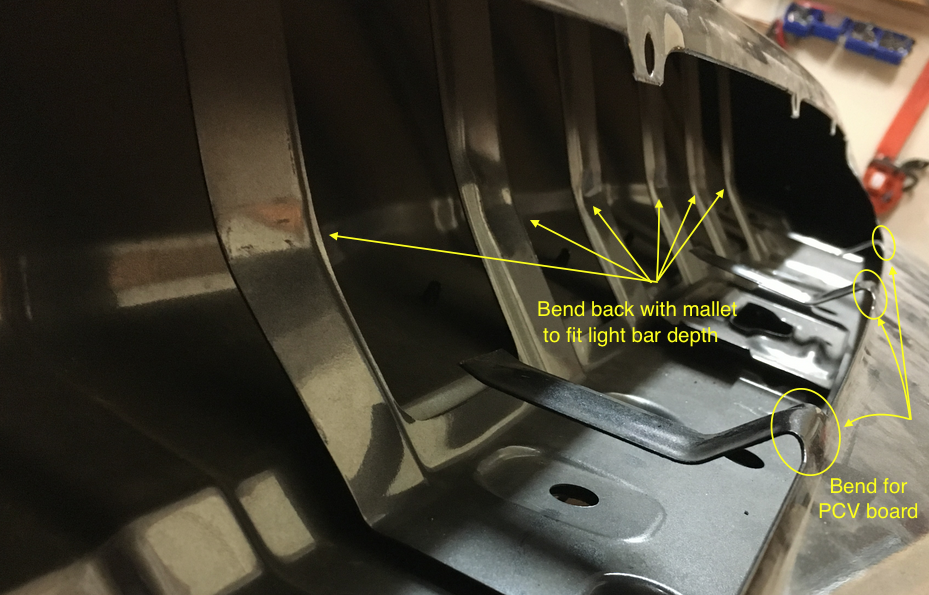
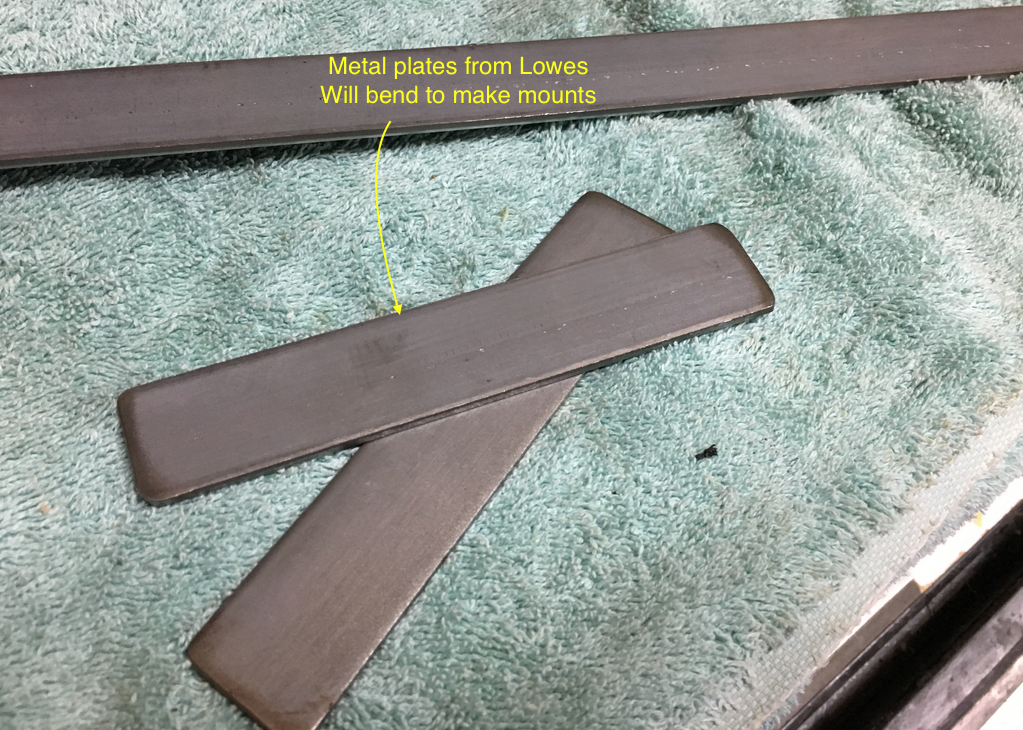
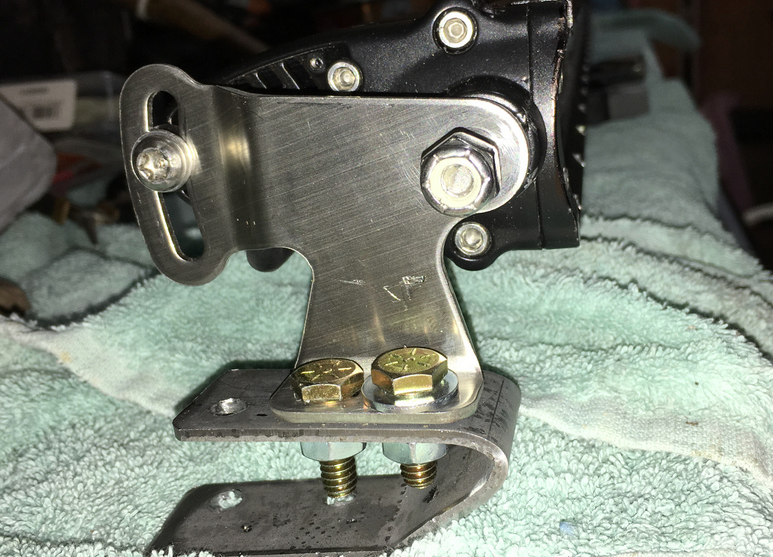
5- Now the fabrication part. Since the stock mounts would not work b/c of a 7/8″ height difference, I went to Lowes and picked up a piece of flat bar, cut it into 5″ lengths and bent it.
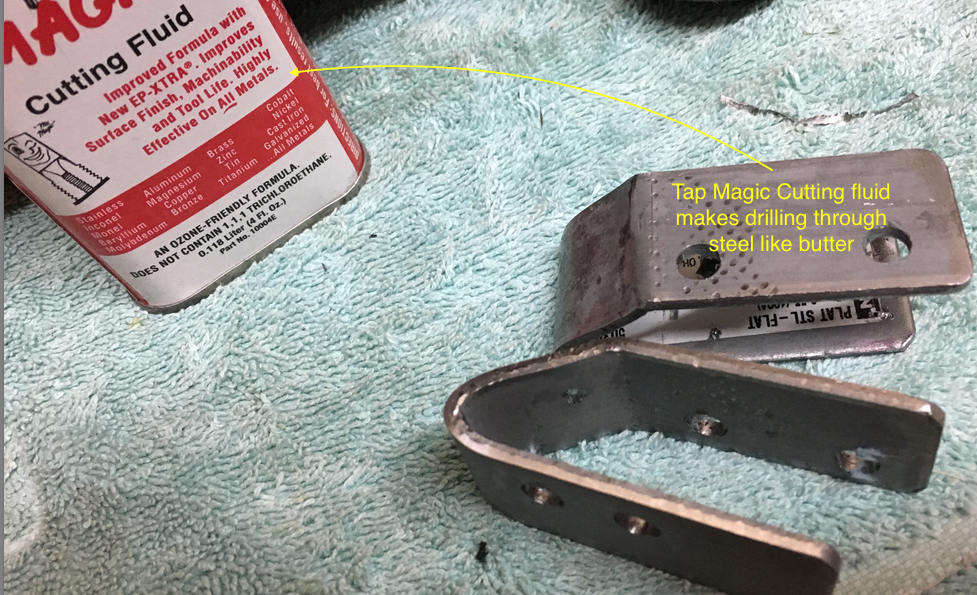
6-If you don’t already have some, get Tap Magic to help cut and drill. It makes a HUGE difference.
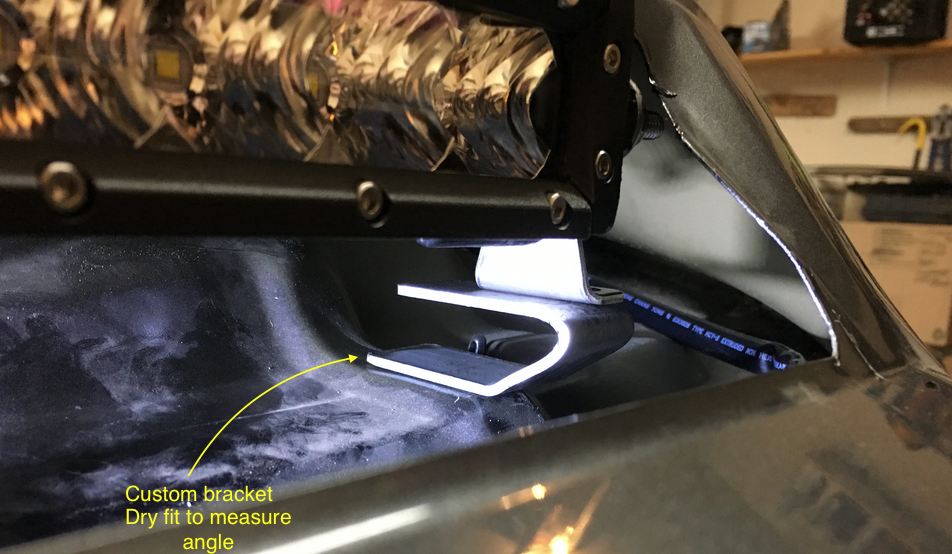
7- Now to dry fit it. Somehow all my measurements were correct so it fit perfect.
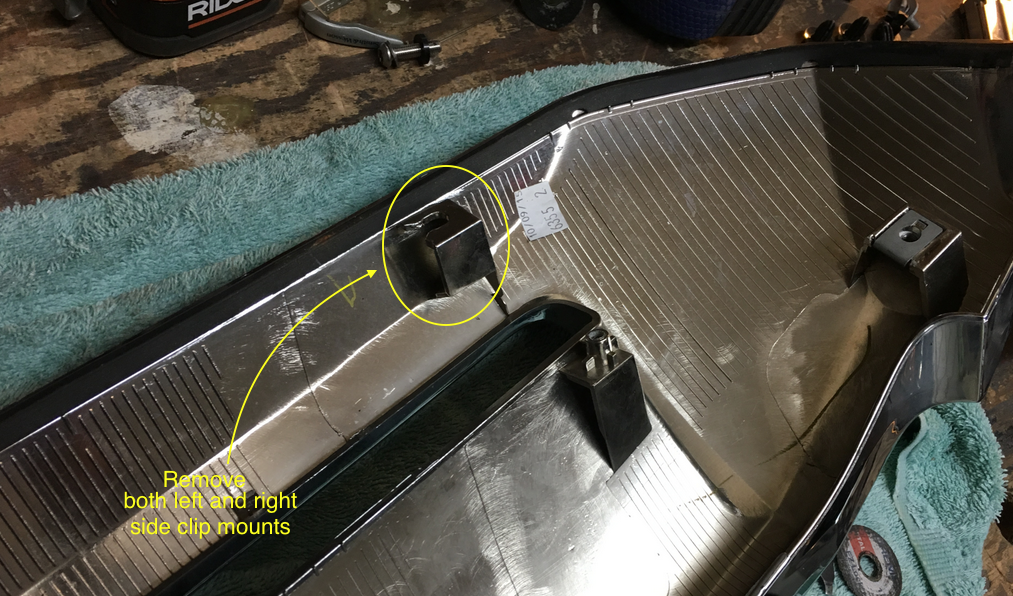
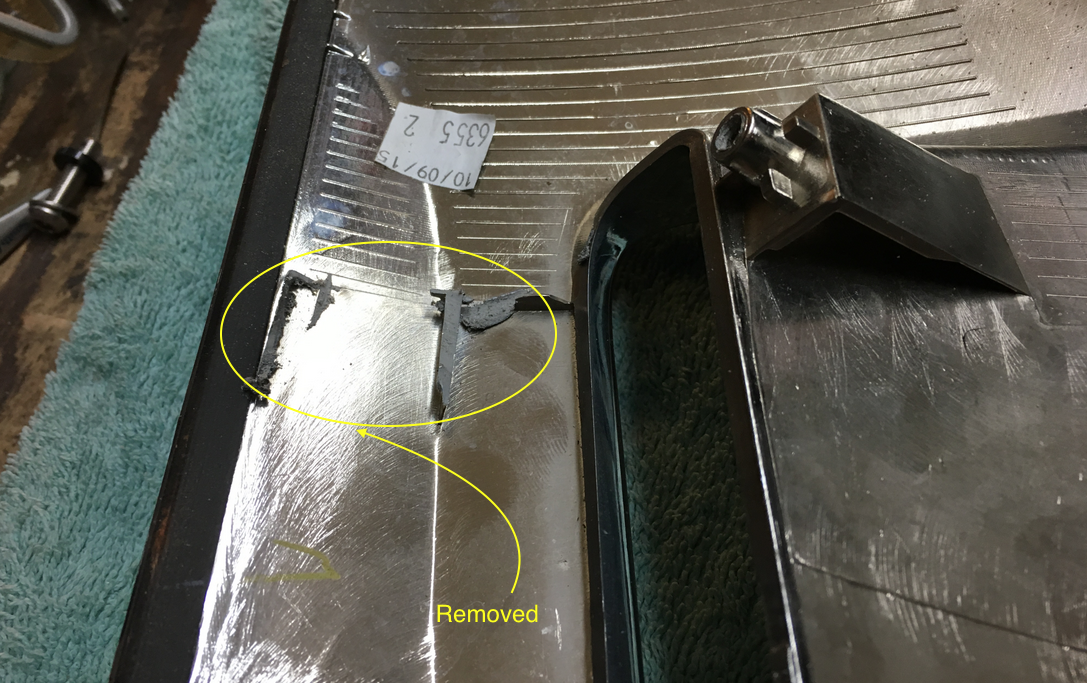
8- I had to remove the clip holder mounts on the grill b/c they were getting in the way now that that light bar was in place. Time to dremel some more…
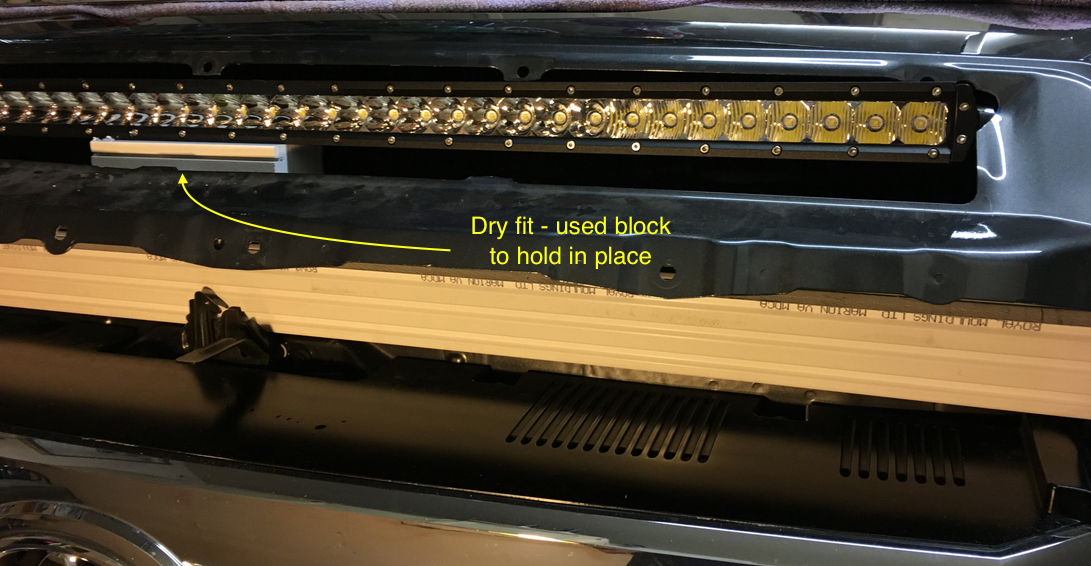
9- Time for another dry fit to make sure everything is fitting the way it should. I used a wooden block to keep it in place.
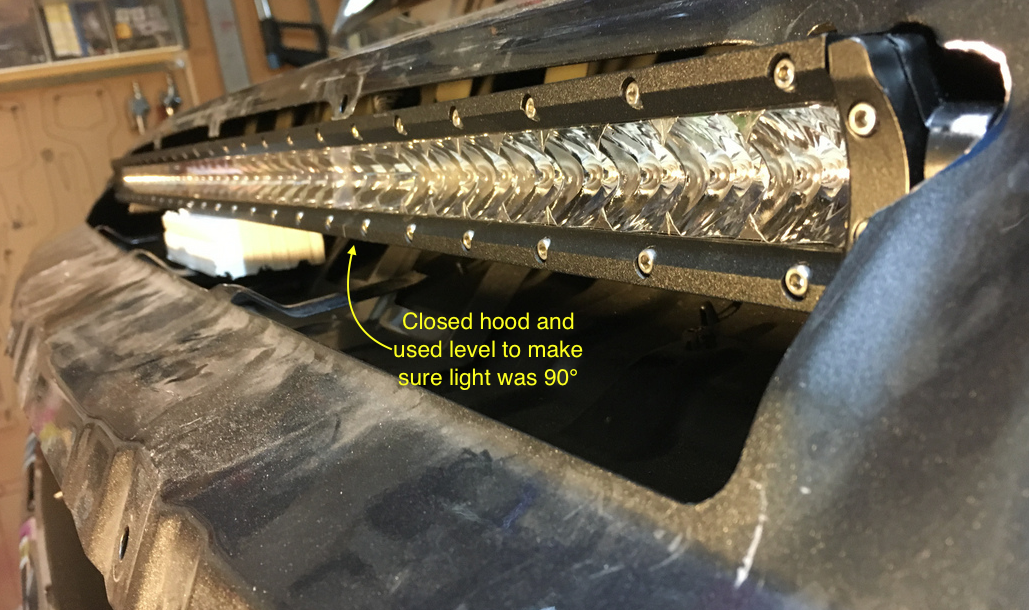
10- Time for the home stretch. I mounted the light bar into position and bolted everything down. I then CLOSED the hood and used a level to make sure the light was sitting at 90-degrees. After a little adjusting, removing the light bar for the final time, I tightened everything and reinstalled it. NOTE: make sure your truck is on a level surface before you level the light bar.
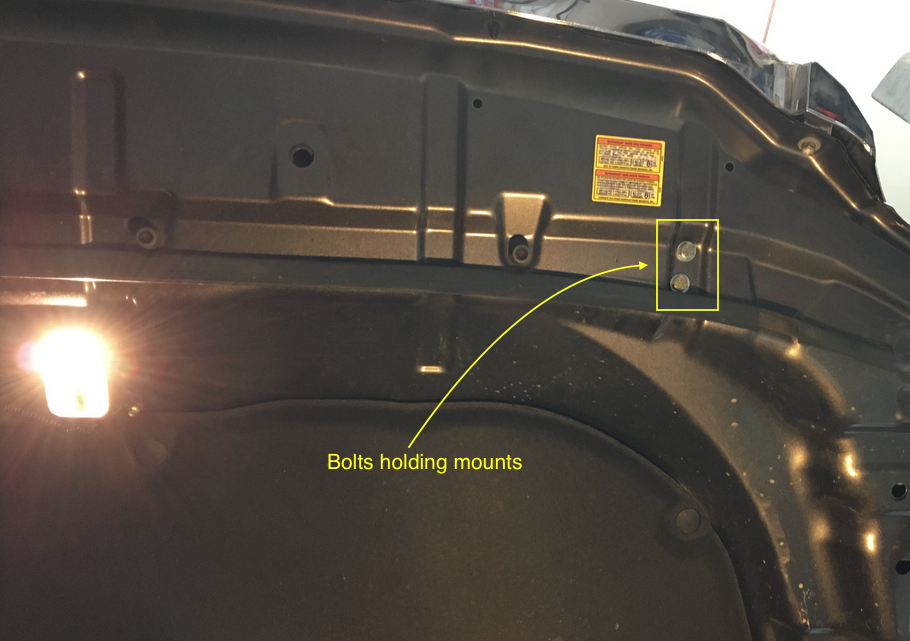
11- Here is a picture of the bolts holding under the hood holding the brackets.
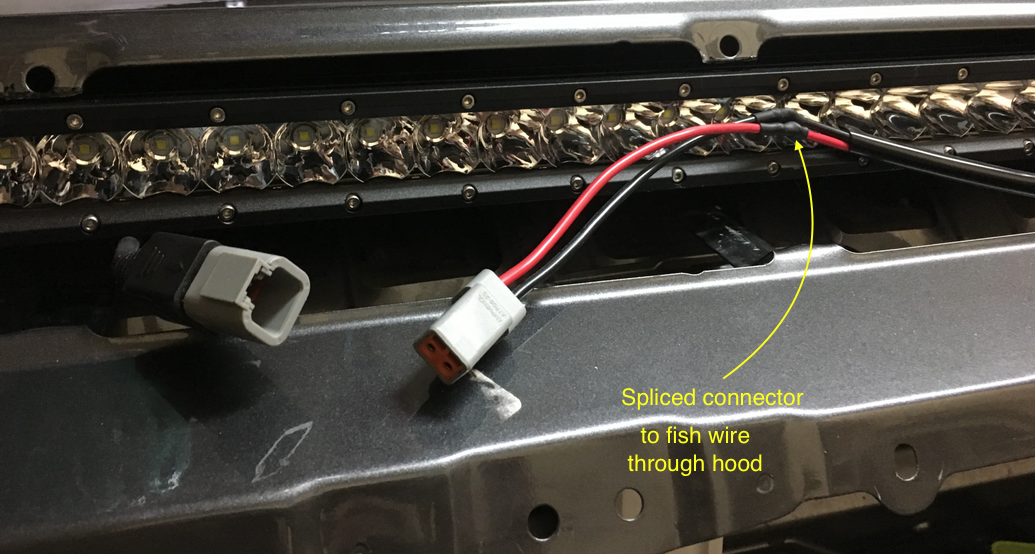
12- I cut the power harness wire b/c the connector was way to big to fish through the existing holes in the hood. It only took a minute to run the wires since the channel in the hood was more than wide enough. I soldered the wires, used shrink tube and was good to go.
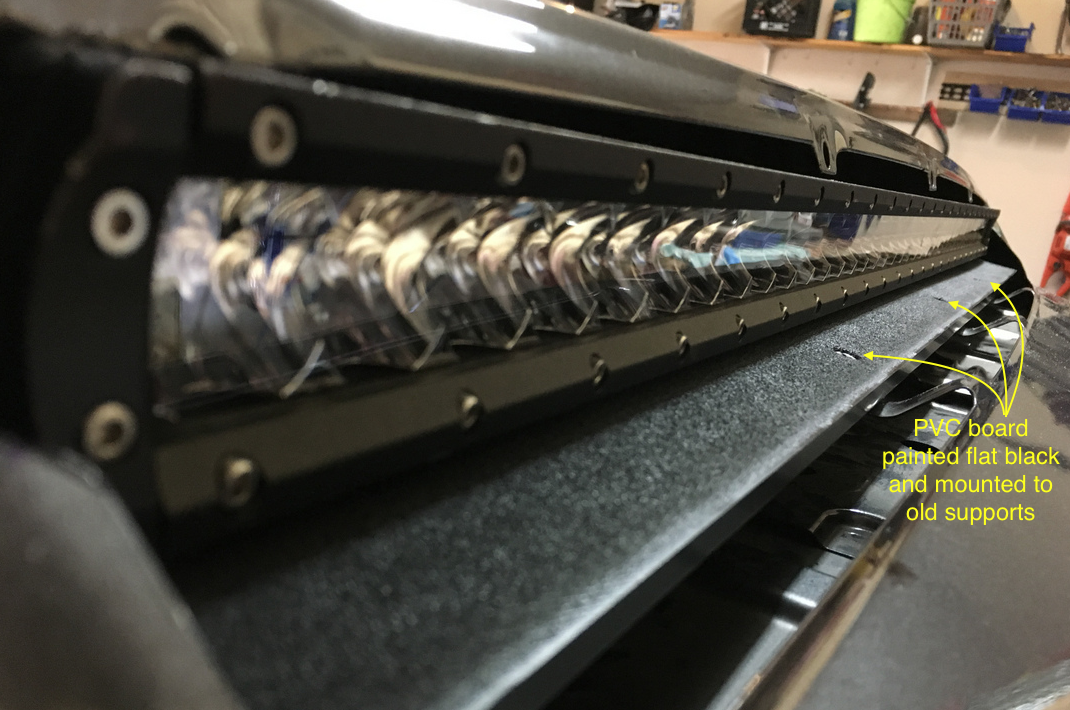
13- After putting everything back together, I noticed when looking in the grill, the bent metal and inside the compartment was showing. It looked pretty ghetto so I cut a piece of PVC board (PVC board will not rot), painted it flat black and used the 3 front supports I cut earlier and bent down to hold the board. Much better!
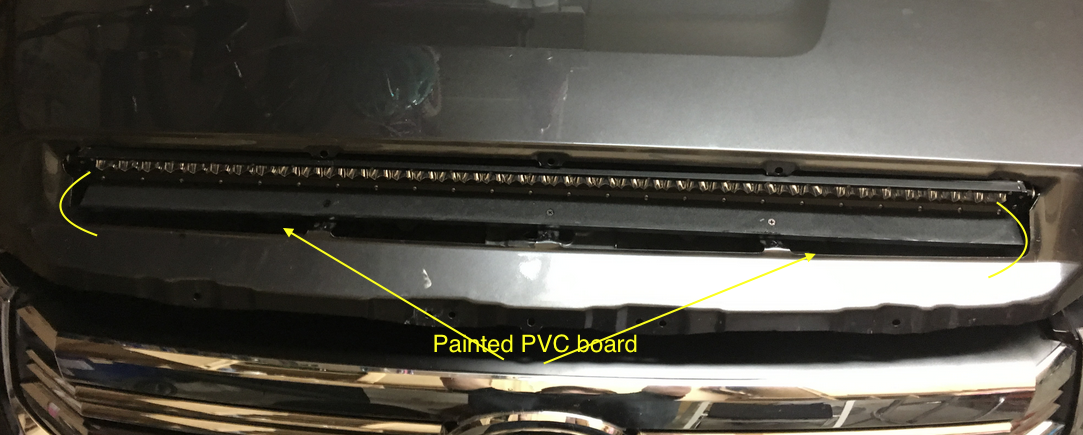
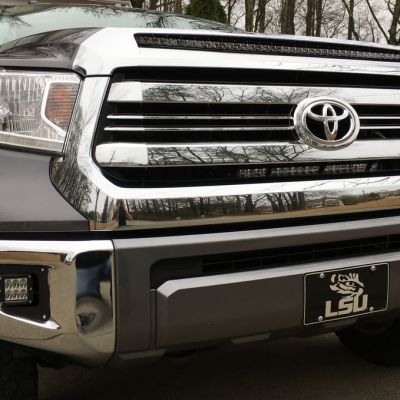
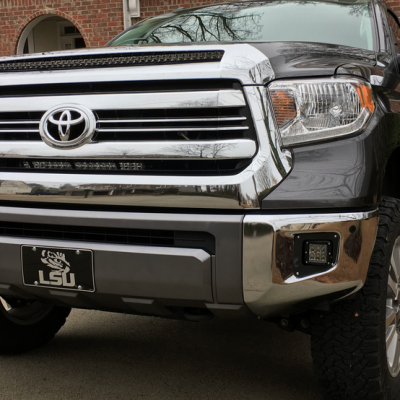
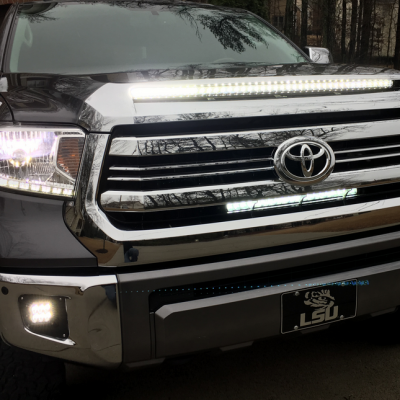
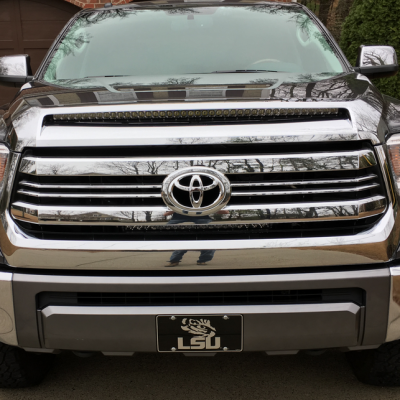
14- And now the final product using the 200w light bar
Customer’s Toyota Tundra Specs-
- 2016 Tundra CrewMax 4×4 1794
- 3″ Daystar Lift
- Custom made sliders
- 275/65/20 T/A KO2s
- Rigid 50231H D2 and 92031EM SR-Series (hidden)
- UnderCover Flex Bed Cover
- LED bed lighting
- SwingCase
- Remote tailgate lock
- ESP Truck Storage
- 40 Inch Single Row LED Light Bar from Nox Lux
Toyota Tundra LED Lights
Want to add auxiliary LED lights to your Toyota Tundra?
Check out our wide selection of performance grade Toyota Tundra off-road LED lights and LED light bars
Click here to shop all of Nox Lux’s Custom Toyota Tundra Mods and Accessories!
DISCLAIMER:
We at Nox Lux strive to provide the most accurate information in everything that we do. That being said, the information on this website/web page is not meant to be construed as actual professional mechanical advice. This particular article was written by a customer of Nox Lux, chronicling every step with text and pics. As with any repair or modification, Nox Lux recommends to consult with a reputable licensed, insured, and bonded mechanic for professional assistance.


