Shopping Cart
$0.00

Urethane CHEVROLET Insert Tailgate Lettering and SILVERADO Overlay Kit

$295.00

  • Tailgate lettering utilizes a multiple step process to create a three-dimensional reflective effect
  • Tailgate lettering fits perfectly inside the Silverado tailgate CHEVROLET channels and distinctively highlights the Chevrolet logo while complementing the body stamping
  • All items install easily with pre-applied genuine 3M™ adhesive backing that is resistant to peeling, weathering and is car wash safe
  • Not compatible with Multi-Flex Tailgate on Silverado
  • Included SILVERADO fender and tailgate badge lettering enhances the style of each side and tailgate of your vehicle, including an LTZ tailgate badge overlay to be used if applicable
  • Includes tailgate lettering, Silverado badge overlays, adhesive material and installation instructions

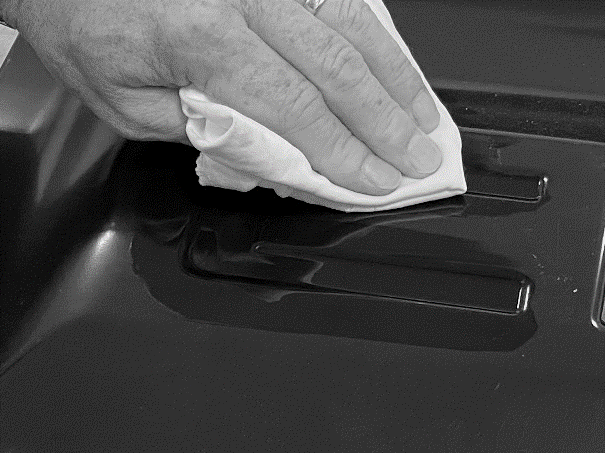
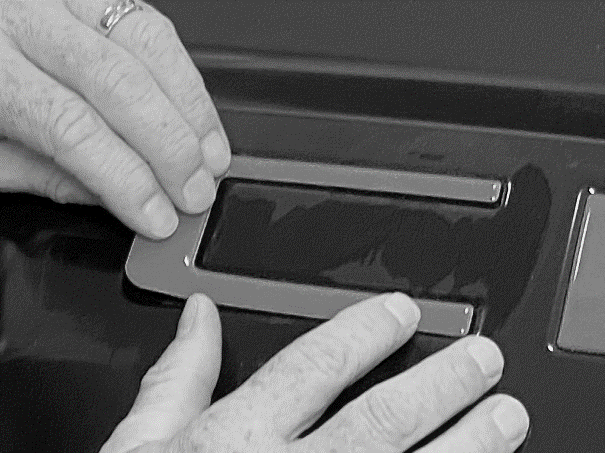
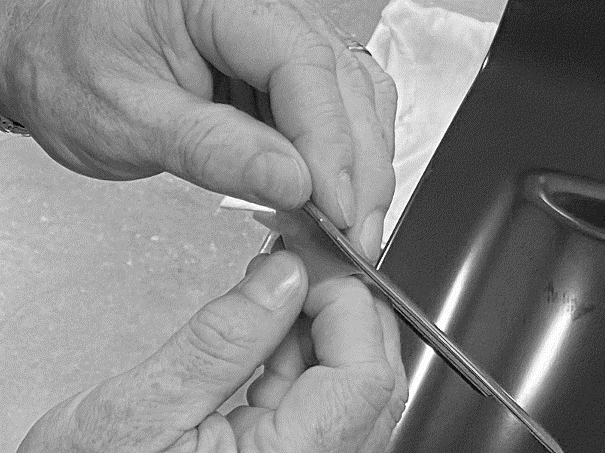
Show off your style and enhance the exterior appearance of your vehicle with Chevrolet Accessories Tailgate Lettering and Overlay Kit. These premium appliques are made of high-quality polyurethane with an adhesive backing, and the tailgate lettering uses a multiple step process to create a three-dimensional effect. The package comes with a Chevrolet lettering applique for the tailgate and Silverado fender badge overlays for each side of the vehicle and tailgate, including an LTZ tailgate badge overlay to be used if applicable.

Specific Vehicle Fit
Year Model
2019 Silverado / Silverado LTZ
2020 Silverado / Silverado LTZ
2021 Silverado / Silverado LTZ
2022 Silverado / Silverado LTZ
2023 Silverado / Silverado LTZ
2024 Silverado / Silverado LTZ
2025 Silverado / Silverado LTZ
WARNING: Cancer and Reproductive Harm – www.P65Warnings.ca.gov

GENERAL MOTORS TRADEMARKS USED UNDER LICENSE TO Nox-Lux (a Maxton Group Company)

Installation Instructions

Installation Instructions

Installation Time: 45 minutes

Tools Required:

Isopropyl Alcohol Lint Free Scratch Resistant Cloth

Procedure – Urethane Letter Inserts

FIG A-1

A. Prepare Surface

  1. Thoroughly clean all the installation surfaces.
  2. Apply isopropyl alcohol mixture to a clean lint free cloth and clean the emblem surface to be installed. Allow the surface to air dry thoroughly. (Fig A-1) Note: Always use a clean, lint-free scratch resistant cloth. Note: Never apply isopropyl alcohol directly to the surface!
  3. Inserts and vehicle installation surfaces must be between 70° F and 110° F at time of installation Note: A heat source may be used to reach minimum temperature if necessary.

B. Verify Kit Contents

  1. Inspect the kit for contents and damage.
FIG C-1

C. Product Installation

  1. Follow Procedure A above to ensure a clean and prepared surface for installation (Fig C-1).
FIG C-2
  1. Check fitment of the insert within the cavity prior to installation (Fig C-2).
FIG C- 3
  1. Remove the liner from the back of the letter, exposing the adhesive backer (Fig C-3). Note: Do not touch the adhesive liner during installation.
FIG C- 4
  1. Align the top edge of the insert and slightly attach the letter (do not fully adhere to the vehicle at this time) (Fig C-4). Note: Do not touch the adhesive liner during installation.
  2. Check the alignment of the letter and make any alignment adjustments before pressing the remainder of the letter into place.
FIG C- 5
  1. Press the remainder of the letter into place (Fig C-5).
  2. Using a soft felt block, press firmly on the letter from the top edge, working downward to the bottom of the letter to ensure maximum adhesion contact.
  3. Repeat steps 1-7 for remaining letters.

Procedure – Badging Overlay

FIG A-1

A. Prepare Surface

  1. Thoroughly clean all the installation surfaces.
  2. Apply isopropyl alcohol mixture to a clean lint free cloth and clean the emblem surface to be installed. Allow the surface to air dry thoroughly. (Fig A-1) Note: Always use a clean, lint-free scratch resistant cloth. Note: Never apply isopropyl alcohol directly to the surface!
  3. Overlays and vehicle installation surfaces must be between 70° F and 110° F at time of installation Note: A heat source may be used to reach minimum temperature if necessary.

B. Verify Kit Contents

  1. Inspect the kit for contents and damage.
FIG C-1

C. Product Installation

  1. Check fitment of overlay over the factory emblem. (Fig C-1).
FIG C-2
  1. Use pull tab to remove adhesive liner from backside of overlay. (Fig C-2).
FIG C-3
  1. Position overlay over the factory emblem ensuring overlay is centered. (Fig C-3).
FIG C-4
  1. Lightly press down to adhere overlay to the factory emblem. (Fig C-4).
  1. Use a lint free scratch resistant cloth, press firmly on the emblem cap from the center working outwards to the edges of the emblem to ensure maximum adhesion contact. (Fig C-5).
Repeat steps 1 – 5 for remaining emblems

FAQ

Frequently Asked Questions

Q: Is there a way to see if this lettering will fit my vehicle?
A: Yes. Consult the product’s fitment information to see if it will fit the year, make and model of your vehicle.

Q: Can the lettering be removed from my vehicle?
A: Yes. The lettering is removable but is a one-time use only.

Q: Are individual replacement letters available?
A: No

Q: Are the lettering and adhesive car wash safe?
A: Yes, but for best results the letters should be hand-washed using mild soap and water and dried with a clean, lint-free towel.

Q: Can the lettering be waxed?
A: No, do not use wax on the letters. If waxing the vehicle, care should be taken to hand-wax around the lettering, and avoid use of an electric buffer in this area.

There are no reviews yet.

Be the first to review “Urethane CHEVROLET Insert Tailgate Lettering and SILVERADO Overlay Kit”

Your email address will not be published. Required fields are marked *